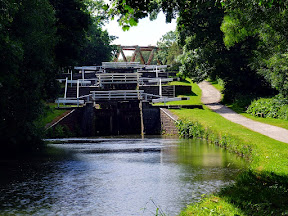
One of the frustrations of digital photography is the urge to grab shots in ever more marginal situations, and then when they turn out to be less than perfect you feel cheated. This is a particular problem with the sort of stuff I do; inevitably, here in Yorkshire, landscapes and buildings are dark, with a sky background that's often overcast cloud, and I'm not always willing or able to visit when the all-too-rare sun's at an ideal angle.
In recent years people have turned to HDR (High Dynamic Range) techniques. They take photos "in RAW format" (a crass bit of misterminology we're sadly stuck with) and they fiddle about using various dodgy algorithms which "tone map" what the camera saw, compressing it into the far narrower range of light and dark that a screen can display. The end result is highly dependent on the taste and effort of the person who does the tone mapping. Unfortunately, most people are hopelessly lazy and have an over developed sense of their own arty-fartyness, and you get horrors like this - here's one I prepared myself using the relevant free software tool, qtpfsgui - a fine piece of software when in the hands of someone with copious time and good taste, but the net is full of dreck like this from people who have neither:
Well, bollocks to all that. There's a better way. It uses two of the new command line tools that come with recent versions of Hugin. (At the moment you need to compile them yourself but a proper release is on its way. I've prepared some SlackBuild scripts and will be submitting them to slackbuilds.org when the release happens.)
First, I use the camera's built in exposure bracketing - when I press the button it takes three successive snaps. The first is a supposedly correct exposure, the second is one stop overexposed to capture the dark details, and the third is one stop underexposed to capture the light details.


But these are successive separate photos, taken half a second or so apart, and movement can occur between them. So, back home, I use align_image_stack, one of the command line tools that comes with Hugin, to fine tune the alignment of the three images. Then I use enfuse, another of the Hugin command line tools, to merge the three aligned images. It works by estimating how authoritative is each region of each input image - a well-exposed region has lots of variation of brightness - and creates a single merged image using appropriate weighting. None of the hideously unnatural tone-mapping nonsense!
The workflow, including a quick final sharpness and colour tweak in the Gimp and save back into JPEG format, looks like this:
align_image_stack -a $TMPDIR/align dscf1234.jpg dscf1235.jpg dscf1236.jpg
enfuse -o dscf1234enf.tif $TMPDIR/align*
gimp dscf1234enf.tif
exiftool -TagsFromFile dscf1234.jpg dscf1234enf.jpg
Note that the final merged image (due to its brief detour into TIFF format) has no EXIF data. What I do is just copy the EXIF from the first of the three images using exiftool - the first image is the one with no exposure bias, so its shutter details are reasonably representative of the synthetic merged image.
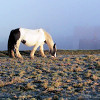
The big problem with this technique is movement. The slightest rustling of wind in the foliage, or the presence of people, animals or vehicles, will produce ghostly effects like this:

However, if the movement is small enough, you can get away with it; you just get a slightly peculiar fluffy effect in the trees, and water comes out looking quite good.

At the end of the day, this is just another technique to use when the results are worthwhile. If you get back home and find that movement ruined the multiple exposure, or it's just too much bother for a casual snap, you can always just select whichever one of the three images is best exposed and tweak its contrast a bit.


0 comments:
Post a Comment